Showing posts with label Carrots. Show all posts

Thursday, May 31, 2012

Growing Carrots in Containers - A Tutorial

We have a limited amount of space in which to garden each year, and one of the simple innovations that allowed me to maximize the return on that space was planting carrots in pots.  Carrots like a nice light dirt, and are prone to being eaten by lots of nasties that live under sod.  You can visit my original carrots-in-containers post here if you'd like to know more, but this post will be a step-by-step photo guide to the entire process, from preparing a container to harvesting your carrot crop!


STEP 1:  Gather your supplies.  You'll need potting soil, carrot seeds, a large , deep bucket, a drill and anything you normally use for potting plants.  If you're using a planter, make sure it's deep enough for the type of carrots you hope to grow and semi-straight (you can also skip the next few steps since planters will already have drainage holes).

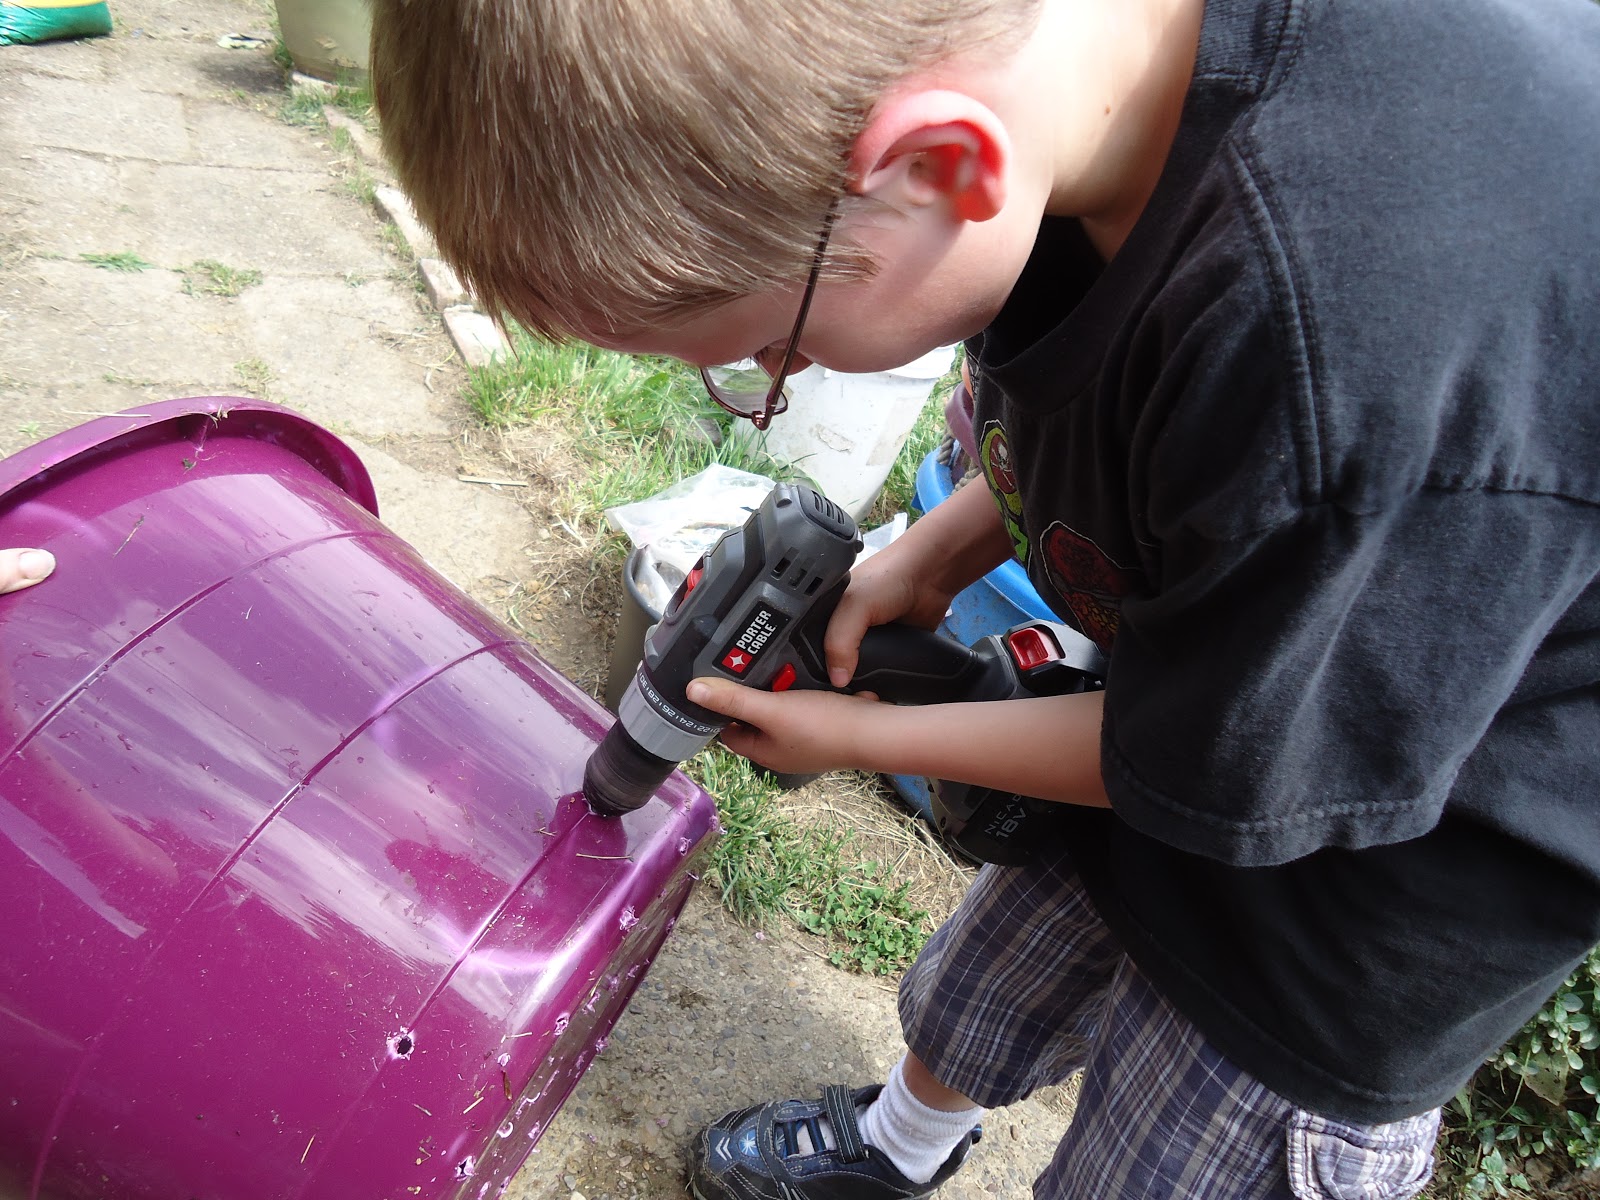
STEP 2:  Drill holes in your bucket around the bottom sides and all over the bottom .  Carrots  need drainage just like anything else planted in containers.    

Your bucket should look something like this when you are done.   

STEP 3:  Fill the container almost to the top with high-quality potting soil.  I leave about 3 to 4 inches of space at the top.  Do not pack down your dirt, as carrots like a nice loose soil, and make sure to break up any clumps.

STEP 4:  Lightly and casually sprinkle about half of a packet of carrot seed on top of the potting soil.  Try to  make sure there are some seeds all over the top of the dirt and don't worry if it seems like there are too many.  Carrot seeds need to be planted with a very small amount of soil on top, so you can either take your finger tips and sort of mess up all the seeds and the dirt at the surface, then lightly pat down, OR you can take a cup of dirt and lightly sprinkle about a 1/4 inch layer over the carrot seeds before lightly patting down.  It's up to you!  Don't over think this part, it's hard to screw up.

STEP 5:  Take a small piece of garden fabric (I use burlap) and press it down onto the newly planted carrot container.  This protects your seeds from birds AND from being moved around too much by the water spray, while also helping them keep moist.  You can skip this step if you want, but I have had much better germination using some kind of cover.  Water your container thoroughly with a gentle spray.  Remember, carrot seeds are TINY.


STEP 6:  Check under your cover everyday, and remove it permanently at the first sign of baby carrots germinating.  

Your carrot container will look something like this after a couple of weeks.  If the carrots aren't distributed very evenly, just make sure to try and sprinkle the carrot seeds more evenly next time.  

STEP 7:  Try to thin your carrots when they are a few inches tall.  I pull mine entirely out, but you can also pinch them off if you find that this disturbs the soil too much.   Try to leave enough space around each carrot to allow it to grow to the thickness of the variety you planted.

A few weeks before harvest your buckets will be filled with tall bushy carrot tops!  

STEP 8:  Pull your carrots!  You can sweep away the dirt at the top of your carrots to check on how big they are getting. Harvest according to the variety you planted.  I pulled these all at once, but you can leave some carrots in the buckets and harvest as needed.  You may not want to do that if you need the container to re-plant, but that's why I have 6 buckets in various stages of growth at all times!


With the addition of compost tea or another fertilizer, you can use the potting soil for multiple years and get several harvests a year!  You may have to pull some weeds the second year, but they are usually not as deep or established as ground weeds.   Growing carrots in pots or containers is also a good way to avoid other common carrot pests like carrot root fly.

Monday, March 19, 2012

Spring Garden Cleaning and Planting

Wow, these last few days have been just beautiful and I've managed to get most of the spring garden totally planted.  A few things might be going in a tad early, but I think I can battle any small frosts with mulch and/or row covers.

This is the first time I've ever tried growing lettuce or chard, so it's a total unknown.  I was extra careful to pull out every inch of invasive root growing through my beds in the hopes that I won't have as bad of a weed problem this year.  It's mind-blowing that those roots were even growing into the clay level about 10 inches down...

Anyway, I'll put up the garden plan soon, but in the mean time here are some pictures of progress from the last few days:

Part of the cleaning was pulling up the remains of last year's brassica bed.

Mr. Smiley in front of the garlic bed.

Baby Nugget just sat around eating crackers while the rest of us worked.

Picking rocks out of beds was a popular task.

At one point we had some music in the garden.

The carrots will again be grown in buckets and were actually the first things we managed to plant.

Digging out weeds.

Watering carrots.

The triangle bed will have lettuce and chard this year.

Cabbage and brussel sprouts (a tad close since we will probably lose a few).

Sunday, January 1, 2012

End of the Season Garden Pictures You May Have Missed Since I Didn't Post Them.

Here are the end-of-season harvests and garden pictures taken during my blogger hiatus:


Six types of eggplant!

It's hard to see what happened here, but this is my row of huge bushy tomatoes after it fell over.  The welds on my tomato cages just gave out and collapsed into a mess of metal stakes and hoops.  Clearly I need to use something else next year.

Harvesting in the rain gives everything a nice glossy look.

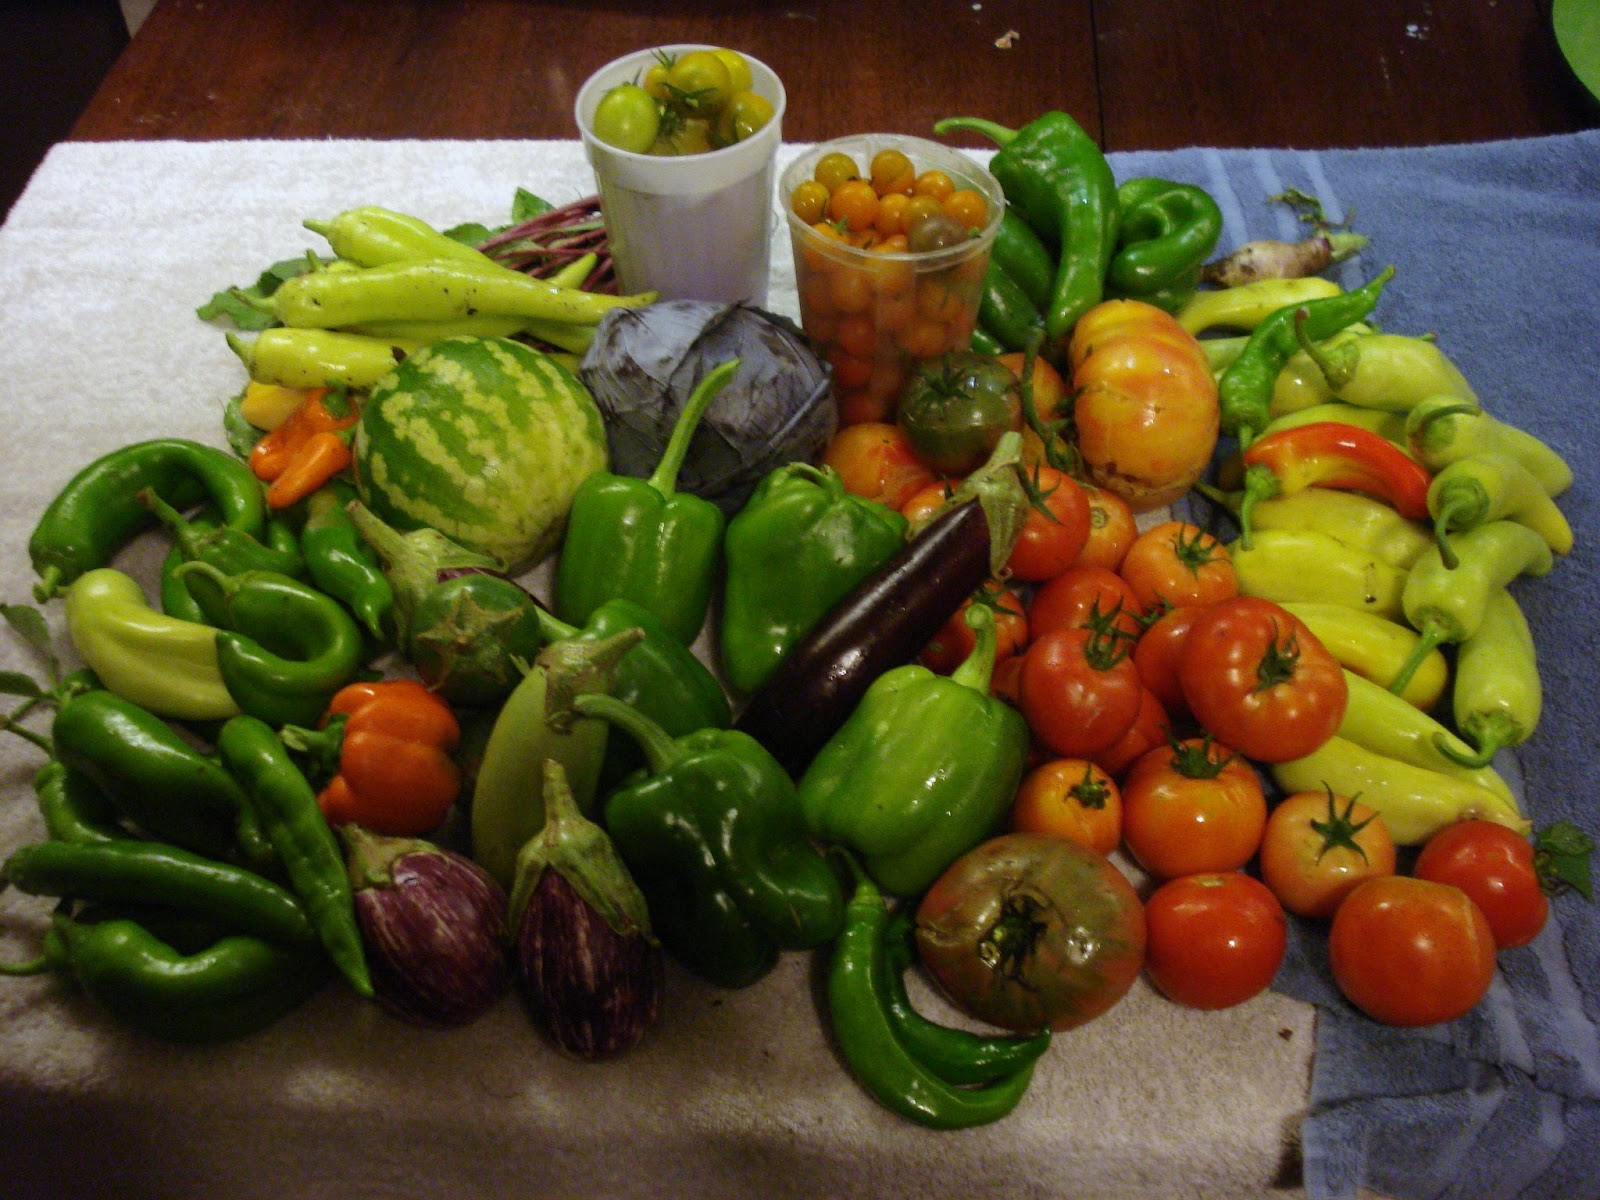
This was definitely the year of the pepper.

Carrots in buckets were a complete success!

The kids were very excited about the different colors.

They would BEG to go harvest carrots.

I really don't remember what type these are, but they tasted good and were 4-6 inches long.

I will buy another packet of these rainbow carrots to keep the kids interested, but they honestly didn't taste much different than the orange carrots.

This year's pitiful onion harvest.

The broccoli is actually still sending off shoots that we pick now and then.  The weather here in Pittsburgh has been unseasonably warm.

One of the last harvests.  There were a ton of baby peppers on the vines when the first killing frost hit.

My Turkish Orange eggplant took FOREVER to ripen anything.

The harvest when we pulled most of the pepper and tomato plants.

Heirloom tomatoes in various stages of ripening.

A small, late garden harvest.

This is the final "harvest" from mid-November.  Beet greens, a few peas and carrots (even ball shaped ones) that I missed earlier, a handful of mostly-ripe Turkish Orange Eggplants and some peppers that somehow survived multiple killing frosts.   I'm not sure those broccoli plants will ever die.

I know I missed quite a few harvests, but this is a good overview of those last few months.  The weather that was so uncooperative this past spring really seems to have worked out well in terms of garden production this fall.  We could have planted several things that I just didn't think we'd have time for....oh well.

Sunday, August 7, 2011

The way of the garden...

The zucchini dies out from Squash Vine Borers and Downey Mildew...

Just as the new crop of zucchini across the yard sets it's first fruit.

New things are germinating in every corner, like this replacement crop  of cucumbers.  White Wonder, Burpless Hybrid, and Lemon.


Fall carrots will soon need thinned.

And icicle radishes are growing strong.


Spring pests like aphids and flea beetles are growing fewer, while the fall plague of stink bugs is  finally here.

The dominant colors in our harvests have shifted from all shades of green to orange and red.

And eagerly awaited tomatoes like this pineapple variety are ripening daily when just a month ago a single grape tomato was cause for celebration.

Some veggies pulled through after they were given up for lost, like this little eggplant.

And a few surprising volunteers are finally letting us know what they are.

Fortunately, for little boys who get bored easily, nature keeps things exciting for us!

Saturday, July 30, 2011

Planting Carrots in Containers

One of our goals for Fall planting is to actually get a good crop of carrots.  As you can see from this Harvest Monday post a few weeks back, our Spring planted carrots didn't really get anywhere due to the overly wet spring and partial clay ground being too hard.

We decided to try growing carrots in containers to avoid the hard ground and the bugs that bored into our other root veggies last fall.  Here's is the general outline of our plan of action:
  • First, we bought several bags of high quality potting soil that is now on sale, plus several packets of carrots and 3 of those big rope-handle tubs with straight sides that people use for beer at barbecue parties.  The potting soil is half the price it was in the spring and will be a nice loose medium for our carrots.  The brand we got had plant food already mixed in.  You will also need burlap, which we already had for free from a coffee house that would otherwise have thrown it away.
  • Second, we drilled a ton of holes in the bottom and around the bottom 2 inches of the sides of our buckets with our biggest drill bit for drainage.  Drill way more holes than you think you need.
  • Third, we filled the buckets 3/4 of the way with the potting soil.  We found that three of the buckets took four bags total of potting soil that contained 1.5 cubic feet each.  Reserve about a gallon of soil in a bucket...maybe a little less.  Make sure you break up the soil clumps if you just pour it into the buckets.  Lightly pat down.
  • Fourth, we sprinkled about half of a packet of carrot seeds on the top of each bucket.  Make sure you get good coverage as you will be thinning in a few weeks.  Carrot seeds are usually clearanced this time of year and we got ours for a few cents.  Spring carrot seeds will cost a bit more.
  • Fifth, we evenly distributed a 1/4 inch layer of potting soil on top of our seeds and lightly patted it down.  Try to make the coverage as even as possible.
  • Finally, we cut a square of the burlap and pressed it down on top of the soil.  We wet it down thoroughly and will keep it moist by watering a few times a day if needed until the seeds germinate.  Be sure to check FREQUENTLY and remove the burlap as soon as you see and carrot greens poking through the soil.  


The straight sided buckets are important for maximizing space if you'll be growing long carrots, but slant-walled buckets and containers can be used as well if you don't plant so much near the edge.  There are also a whole bunch of shorter carrot varieties that might work out well in shallower containers.  Just remember that the tap root will be quite a bit longer than the carrot itself, so you can't just go by the expected carrot length when deciding on soil depth.  

Good luck to anyone who decides to try it!  Here are what ours look like now...I'll keep you posted on the results.

Our carrot buckets.

Carrot bucket number two.  We have three total.

UPDATE:  It was a HUGE success!  For the first time ever we got LOADS of perfect carrots!  Here's the post with pictures of the results:  http://www.awesomeburgh.com/2012/01/end-of-season-garden-pictures-you-may.html