Showing posts with label Spring. Show all posts

Thursday, May 31, 2012

Growing Carrots in Containers - A Tutorial

We have a limited amount of space in which to garden each year, and one of the simple innovations that allowed me to maximize the return on that space was planting carrots in pots.  Carrots like a nice light dirt, and are prone to being eaten by lots of nasties that live under sod.  You can visit my original carrots-in-containers post here if you'd like to know more, but this post will be a step-by-step photo guide to the entire process, from preparing a container to harvesting your carrot crop!


STEP 1:  Gather your supplies.  You'll need potting soil, carrot seeds, a large , deep bucket, a drill and anything you normally use for potting plants.  If you're using a planter, make sure it's deep enough for the type of carrots you hope to grow and semi-straight (you can also skip the next few steps since planters will already have drainage holes).

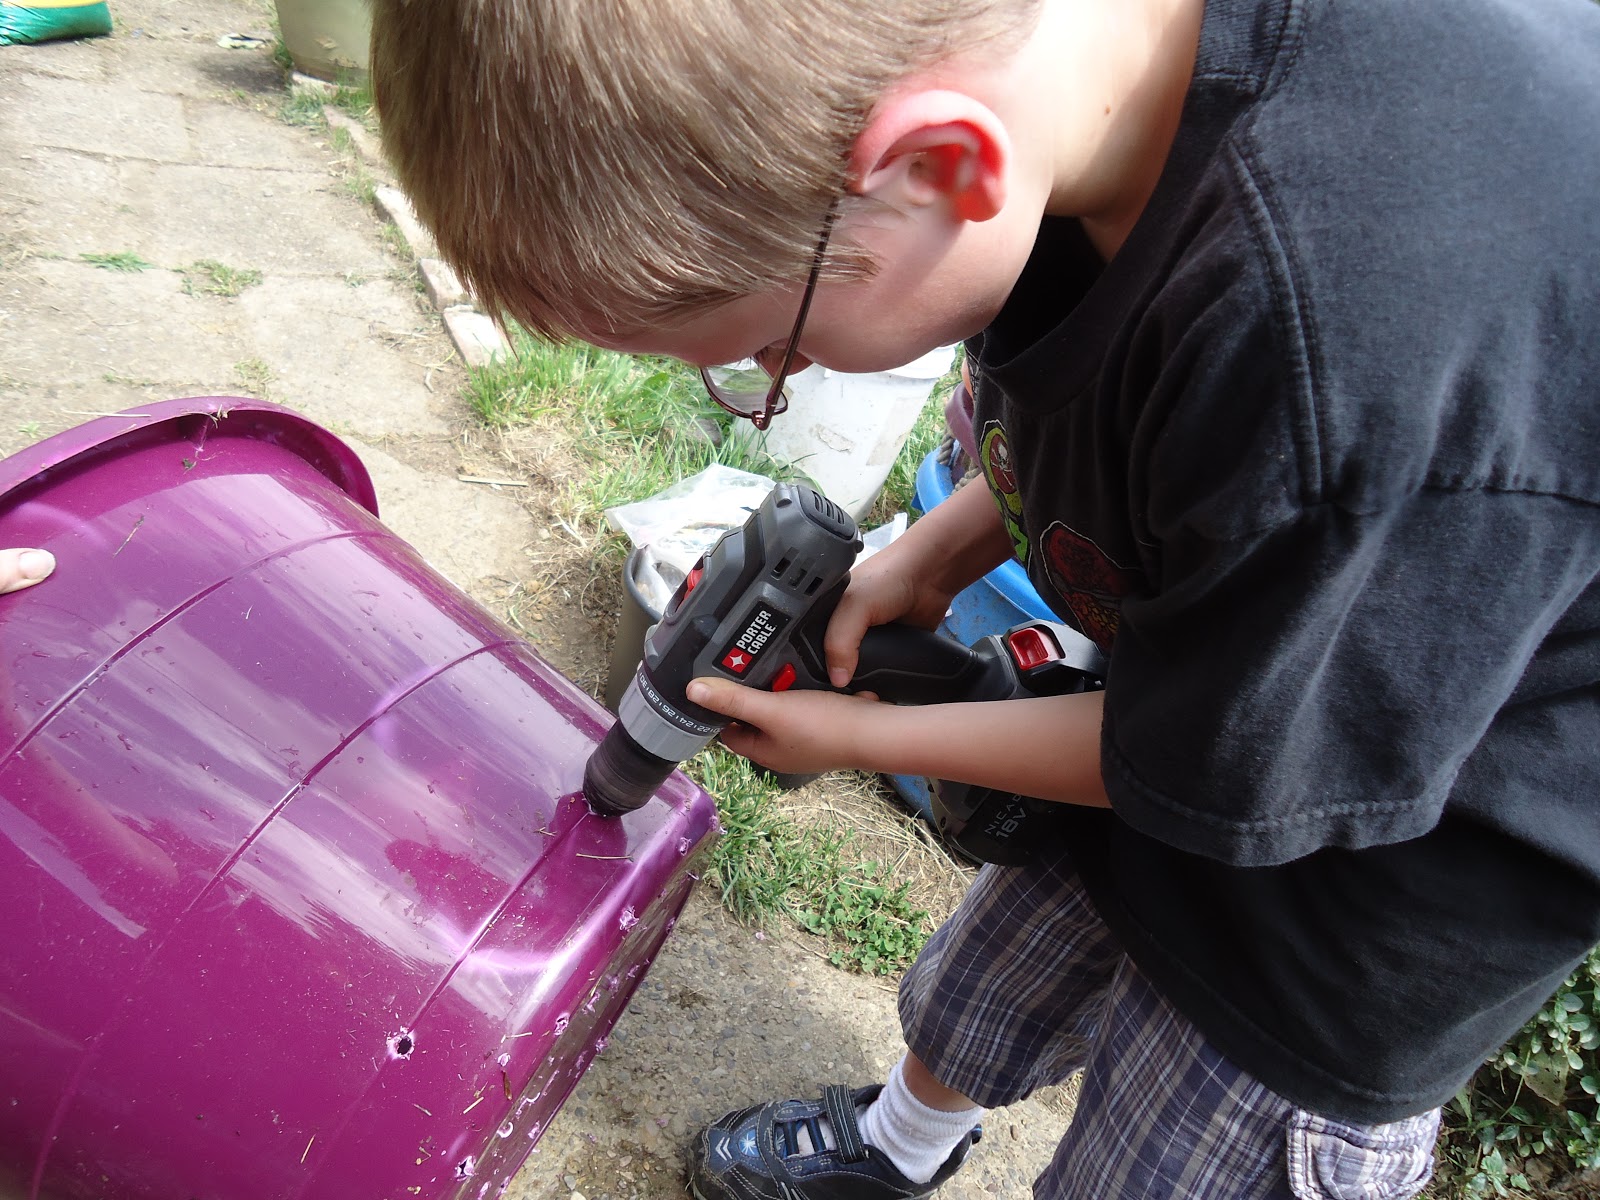
STEP 2:  Drill holes in your bucket around the bottom sides and all over the bottom .  Carrots  need drainage just like anything else planted in containers.    

Your bucket should look something like this when you are done.   

STEP 3:  Fill the container almost to the top with high-quality potting soil.  I leave about 3 to 4 inches of space at the top.  Do not pack down your dirt, as carrots like a nice loose soil, and make sure to break up any clumps.

STEP 4:  Lightly and casually sprinkle about half of a packet of carrot seed on top of the potting soil.  Try to  make sure there are some seeds all over the top of the dirt and don't worry if it seems like there are too many.  Carrot seeds need to be planted with a very small amount of soil on top, so you can either take your finger tips and sort of mess up all the seeds and the dirt at the surface, then lightly pat down, OR you can take a cup of dirt and lightly sprinkle about a 1/4 inch layer over the carrot seeds before lightly patting down.  It's up to you!  Don't over think this part, it's hard to screw up.

STEP 5:  Take a small piece of garden fabric (I use burlap) and press it down onto the newly planted carrot container.  This protects your seeds from birds AND from being moved around too much by the water spray, while also helping them keep moist.  You can skip this step if you want, but I have had much better germination using some kind of cover.  Water your container thoroughly with a gentle spray.  Remember, carrot seeds are TINY.


STEP 6:  Check under your cover everyday, and remove it permanently at the first sign of baby carrots germinating.  

Your carrot container will look something like this after a couple of weeks.  If the carrots aren't distributed very evenly, just make sure to try and sprinkle the carrot seeds more evenly next time.  

STEP 7:  Try to thin your carrots when they are a few inches tall.  I pull mine entirely out, but you can also pinch them off if you find that this disturbs the soil too much.   Try to leave enough space around each carrot to allow it to grow to the thickness of the variety you planted.

A few weeks before harvest your buckets will be filled with tall bushy carrot tops!  

STEP 8:  Pull your carrots!  You can sweep away the dirt at the top of your carrots to check on how big they are getting. Harvest according to the variety you planted.  I pulled these all at once, but you can leave some carrots in the buckets and harvest as needed.  You may not want to do that if you need the container to re-plant, but that's why I have 6 buckets in various stages of growth at all times!


With the addition of compost tea or another fertilizer, you can use the potting soil for multiple years and get several harvests a year!  You may have to pull some weeds the second year, but they are usually not as deep or established as ground weeds.   Growing carrots in pots or containers is also a good way to avoid other common carrot pests like carrot root fly.

Monday, May 28, 2012

#%$*&@!!!!!!!!!!

Wow.

So the year that I finally get it together enough to plant peas in March and I can't even plant the correct type.  Arrrrg.

I planted 3 different types of peas, all from seed I got last fall at local hardware store.  I THOUGHT I was careful enough to pick only types that are snow or snap with an edible pod, but it turns out I am not.  Two of my 3 pea areas are planted with non-edible pod peas, Bolero and Garden Sweet.  What makes it worse is that the third bed that is planted with snow peas was accidentally wrecked by my husband and our new weed-whacker, leaving just four plants capable of producing.

The kids don't seem to care and have been eating the pea pods anyway, but I tried one and it was terrible and fibrous.  I asked them to stop eating them so we can let them grow to shelling size...I'm told fresh peas are amazing, though even the best shelled peas will be bittersweet since they are coming at the cost of snow peas for stir-fry.

The pea circle is planted with Bolero peas...which also explains the bushiness.  Bolero stays pretty short.

A palm full of bolero peas.   We picked them young but they were still very tough.


Ah well.  I guess we'll just have to wait for fall and try again.  In the meantime, we should have shelling peas soon.


Tuesday, May 8, 2012

How to garden on a hillside...


This hillside has been a pain in my butt for 2 seasons now.  There is a flat area at the top and then a sharp slope that is fine for planting things like melons, but gets so quickly overgrown that a raised bed is really the only way to go.  We managed to get some nice salvaged lumber from a friend and built two LARGE raised beds.  We dug the lower one in so that each bed would be level.   Now I have a 10' x 3' bed AND an 8' by 3' bed of beautiful fluffy soil (organic topsoil with rabbit manure, hay, and compost).   

Stage 1:  Cut down grass and loosen sod.


Stage 2:  Level the area where the beds will sit, lay the frames and fill with dirt.


Stage 3:  Bask in the glory of your new garden beds!


They turned out so beautifully that I really think we're going to convert ALL the beds to wooden raised beds as soon as they are empty.  They'll be a heck of a lot easier to weed-whack around, that's for sure.


Monday, April 30, 2012

Harvest Monday: End of April

Once again I actually have a harvest (not bad for April gardening in Pennsylvania with no cold frame) but it's still just one veggie.   Better than nothing!  Head on over to Daphne's Dandelions and check out this week's Harvest Monday post to see what everyone else has been harvesting.

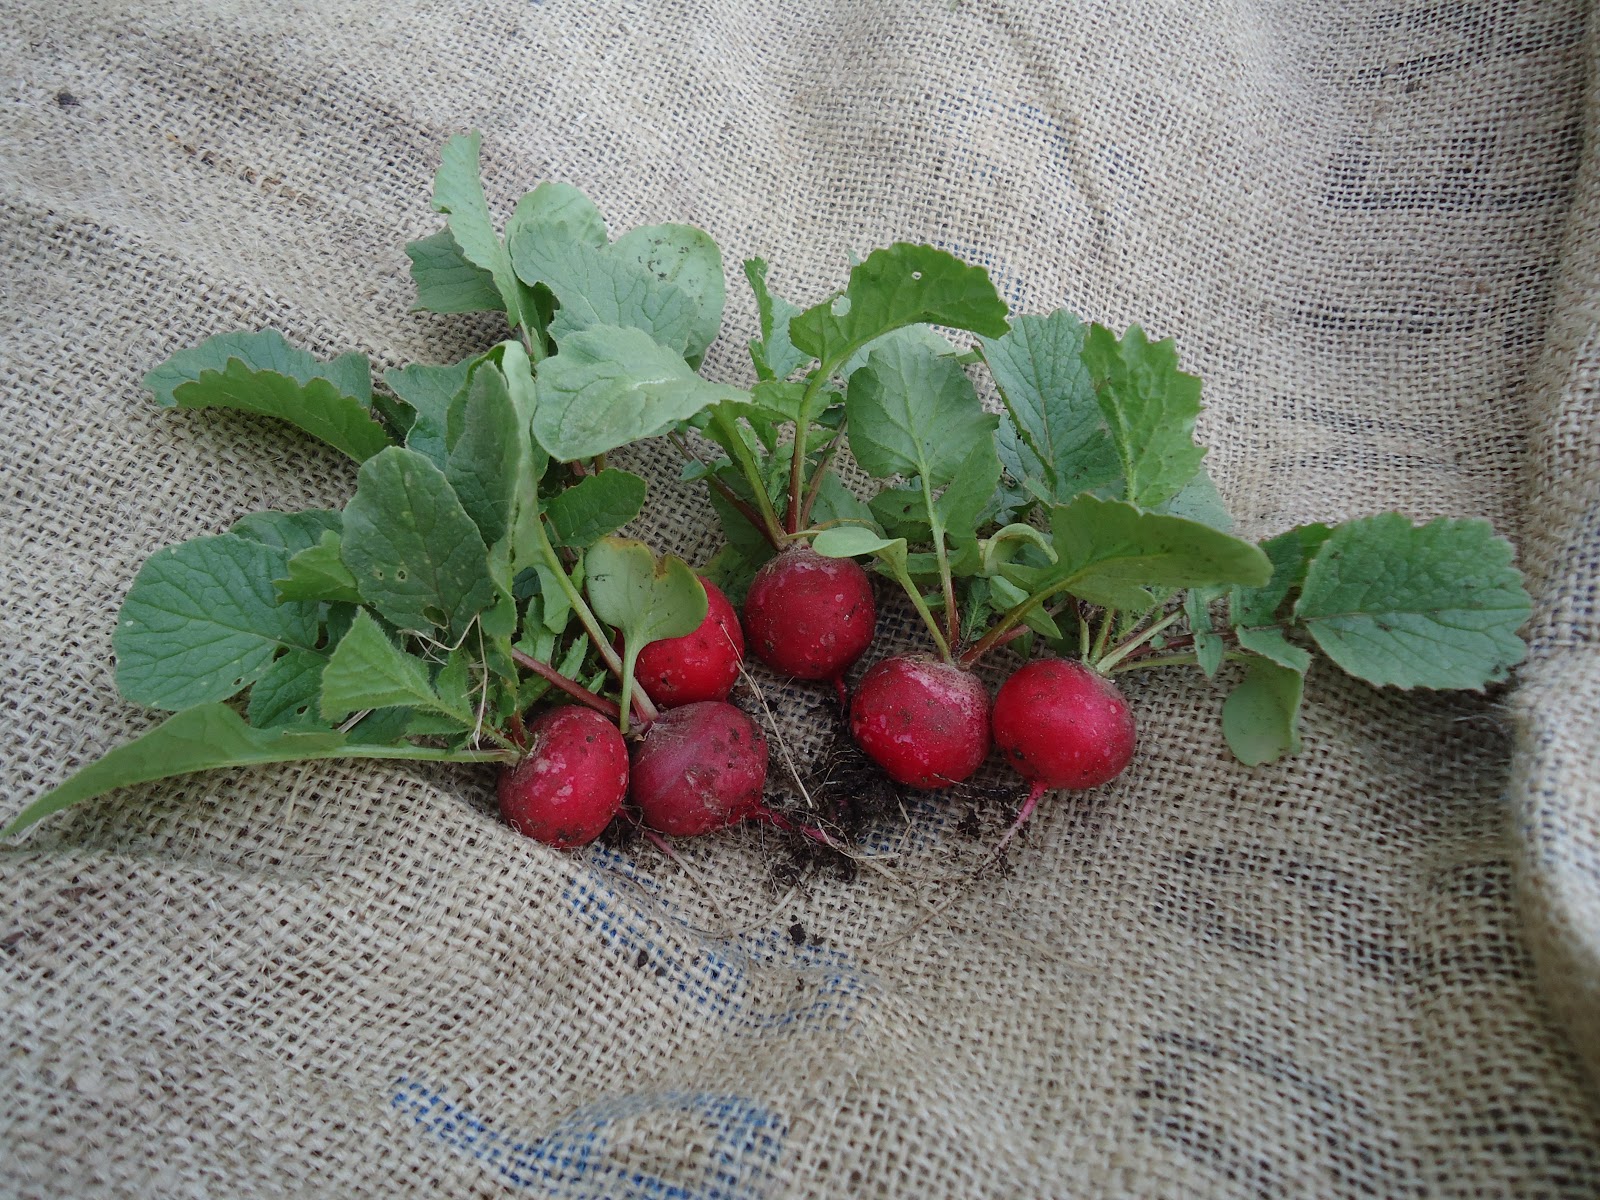
Our radish harvest for the week.

It seems that we are not the only things enjoying the radishes.  I did see several tiny millipedes  in the ground, but I don't know if they caused the radishes to split or just ate the holes into them.

The brassicas are coming along nicely, though I will have to thin them soon.  

The lettuce is also coming along nicely.

The peas growing in the back of the garlic bed finally have a trellis to climb.  I used two U posts and some plastic deer fencing.

Tuesday, April 24, 2012

Harvest Monday: First harvest of Spring 2012!

Ok, so it's just a bunch of spring onions but it's something!  Thanks to Daphne for hosting Harvest Monday (and giving me an excuse to get back on the garden blog horse).


I had decided to pull these and eat them instead of just pulling and replanting...the bed they were in needed about 6 more inches of compost so I could plant herbs.

Spring onions, cleaned and ready to slice.


These are a couple of the thinnings from my radish bed.  They are about dime-sized, and the one on the left is a watermelon radish.  Not much I can do with them though.


I sliced into one of these and they smell strongly of garlic.  Originally I thought it might be onions growing on my hillside, but now I think maybe garlic growing from composted store-garlic.

Tuesday, April 3, 2012

Planning an Accessible Garden

I had been planning on updating this over the weekend, but we ended up dealing with some unexpected issues that have delayed things a bit.  Even now I haven't really been out in the garden today, so I'm throwing myself into planning one of the really exciting gardening projects I've been offered this season!

My husband works with a non-profit that helps disabled individuals live their lives.  The house he works in has a beautiful yard and the gentlemen in the house tend to eat less-healthily than they otherwise could due to the tight food budget.  I offered to stop over once a week with the kids and maintain a small food garden at the house.  All the current workers would have to do was water it and harvest things that are obviously ripe.  The gentlemen in the house would benefit from the interaction with the kids, the time outside, and the fresh food they grew themselves.

The biggest problem with this plan, is the start-up cost associated with a garden.  The house operates on a pretty tight budget, and garden tools and soil for raised beds aren't exactly things that provide a quantifiable benefit as quickly as most other household expenditures.   I can spare some seeds, and barring that each of the men in the house has a food stamp allotment due to their disability that can be used for plants and seeds, but we're still going to have to get creative with everything else.

I have a much larger post about barriers to gardening that I'll be posting soon as a result of this process.  Tomorrow we have a trip to a local farm with the younger kids so that should be fun.  

Monday, March 19, 2012

Spring Garden Cleaning and Planting

Wow, these last few days have been just beautiful and I've managed to get most of the spring garden totally planted.  A few things might be going in a tad early, but I think I can battle any small frosts with mulch and/or row covers.

This is the first time I've ever tried growing lettuce or chard, so it's a total unknown.  I was extra careful to pull out every inch of invasive root growing through my beds in the hopes that I won't have as bad of a weed problem this year.  It's mind-blowing that those roots were even growing into the clay level about 10 inches down...

Anyway, I'll put up the garden plan soon, but in the mean time here are some pictures of progress from the last few days:

Part of the cleaning was pulling up the remains of last year's brassica bed.

Mr. Smiley in front of the garlic bed.

Baby Nugget just sat around eating crackers while the rest of us worked.

Picking rocks out of beds was a popular task.

At one point we had some music in the garden.

The carrots will again be grown in buckets and were actually the first things we managed to plant.

Digging out weeds.

Watering carrots.

The triangle bed will have lettuce and chard this year.

Cabbage and brussel sprouts (a tad close since we will probably lose a few).

Tuesday, June 21, 2011

Around the garden...


I picked up two Golden Treasure pepper plants a few weeks back without really knowing anything other than that they are a sweet yellow pepper.  After doing some research, it appears they are quite long (8" to 9") and resemble banana peppers.  The plants are now barely a foot tall but there is one baby pepper already growing.

I have multiple clusters of Early Girl tomatoes growing on my two plants.  The other tomatoes have yet to achieve fruit set, though there may be some in hiding.

On the left, you can see a pretty large volunteer tomato in my tomato bed.  I'm torn because it's VERY close to my Early Girl and too big to move.  I think I'll be leaving it and keeping my fingers crossed.  

Yesterday's harvest was one kidney shaped ichibahn eggplant and a bowl full of basil.

The two Gypsy Bell's have a total of 4 baby peppers including the big one I keep watching.

The first Saffron Summer Squash...there are no male flowers yet though.

This kohlrabi will be harvested later today.  

Our newest family member is now 4 weeks old, and LOVES just sitting in a rocking chair sucking on a finger after she eats or when she's feeling cranky.  Unfortunately for her, Daddy's finger won't do, and Mommy's fingers aren't always ready when she is in finger mode.  See the problem here?
It's not good enough to just wash my hands either...I have to actually scrub and make sure none of the garden dirt stays under my finger nails or else it will end up in her little tummy.  Granted I ate tons of dirt as a kid, but I'm pretty sure the only thing a 4 week old needs right now is milk.


Monday, June 20, 2011

Zucchini and eggplant harvest!

These are going into stir-fry tomorrow with some left-over great northern beans and whatever else we have in the house.  I picked them a tad small because I just couldn't wait  :)

We've given up on peas until fall and yanked all of these out of the pea circle today.  In it's place I direct seeded a zucchini called "Sure Thing Hybrid".  I'm thinking I will just plant beans and zucchini where ever I have room at varying intervals since they grow so quick and we could never have too many.   Plus last year we lost all of our summer squash after the first few harvests.  Also, check out the little volunteer tomato in the lower right part of the picture...I'm going to leave it alone and see if it can compete with the grass).

 Ugh.  My eggplants are all covered and this is the plant that looks the healthiest.  I think I'm going to lose my only traditional eggplant, so I need to make a plan.  Even my tiny little Turkish eggplants in a different area of the garden have been totally destroyed now by the flea beetles.

I'm pinning all my hopes on finding replacement seedlings at Garden Dreams later this week.  I have my heart set on growing some Turkish Orange stuffers, and it's included in their list of seedlings.  As a bonus, they are having and end-of-season sale with all seedlings at 50% off PLUS a free tomato, eggplant and pepper plant with each purchase!  If you're in the Pittsburgh area, go check them out...currently they are Certified Naturally Grown, but are working towards becoming Certified Organic.  If I come back with new eggplants, I will be potting them in an entirely different part of the yard and covering them until they get to fruiting stage.  


Sunday, June 19, 2011

Out with Aphids and in with Flea beetles.

My second round of eggplants are now being full-scale assaulted by flea beetles.  It seems like the organic soap spray I doused them with has eliminated the beetles on the plants in the back yard, but the ones in the front are now being feasted upon as well.  I hadn't looked too closely at them in a few days, so several leaves on each plant look like some jerk sat in my yard and poked the crud out of them with sewing needles.  I tried to manually squish some of the little bastards to be a warning sign for the rest of the flea beetles, but they just hopped away while giving me the buggy-finger.  Hopefully the thorough dousing in soap spray puts them in their place.  Mwahahahahaha...

On the plus side, the ladybug release has seemed to eliminate the aphids from the garden entirely.  The number of holes being eaten in my bean and pepper plants by mystery bugs has also decreased greatly, which is comforting because the beans were looking pretty questionable a few weeks back.


I couldn't bear thinning every single broccoli, so I saved one in a bucket.  It's the last on the right here and seems to be doing well so far.

The pepper bed is lush and green and seems to have recovered well from the bug that was eating holes in the leaves.  I won't be putting down straw since it just makes it harder to weed.

The space miser plants have produced two squash that ended up being unpollinated.  I cut them off today and will be watching the bee status of the garden a bit more closely.  This might just be the result of not having a male flower at the time, though it does worry me that I got rid of almost all of the pretty flowers that bees like in order to make room for more veggies.

I thinned the pan patty squash down to three pants and the cucumbers down to two plants per spot.  The royal burgundy bush beans are nice and bushy, so I hope to see some flowers soon.

This one kohlrabi is way bigger than the others.  No idea why.

My tiny pepper!  Last year peppers were one of the latest things to set fruit.  Expect new pictures of this guy on a semi-frequent basis until he's ripe...