Thursday, May 31, 2012

Growing Carrots in Containers - A Tutorial

We have a limited amount of space in which to garden each year, and one of the simple innovations that allowed me to maximize the return on that space was planting carrots in pots.  Carrots like a nice light dirt, and are prone to being eaten by lots of nasties that live under sod.  You can visit my original carrots-in-containers post here if you'd like to know more, but this post will be a step-by-step photo guide to the entire process, from preparing a container to harvesting your carrot crop!


STEP 1:  Gather your supplies.  You'll need potting soil, carrot seeds, a large , deep bucket, a drill and anything you normally use for potting plants.  If you're using a planter, make sure it's deep enough for the type of carrots you hope to grow and semi-straight (you can also skip the next few steps since planters will already have drainage holes).

STEP 2:  Drill holes in your bucket around the bottom sides and all over the bottom .  Carrots  need drainage just like anything else planted in containers.    

Your bucket should look something like this when you are done.   

STEP 3:  Fill the container almost to the top with high-quality potting soil.  I leave about 3 to 4 inches of space at the top.  Do not pack down your dirt, as carrots like a nice loose soil, and make sure to break up any clumps.

STEP 4:  Lightly and casually sprinkle about half of a packet of carrot seed on top of the potting soil.  Try to  make sure there are some seeds all over the top of the dirt and don't worry if it seems like there are too many.  Carrot seeds need to be planted with a very small amount of soil on top, so you can either take your finger tips and sort of mess up all the seeds and the dirt at the surface, then lightly pat down, OR you can take a cup of dirt and lightly sprinkle about a 1/4 inch layer over the carrot seeds before lightly patting down.  It's up to you!  Don't over think this part, it's hard to screw up.

STEP 5:  Take a small piece of garden fabric (I use burlap) and press it down onto the newly planted carrot container.  This protects your seeds from birds AND from being moved around too much by the water spray, while also helping them keep moist.  You can skip this step if you want, but I have had much better germination using some kind of cover.  Water your container thoroughly with a gentle spray.  Remember, carrot seeds are TINY.


STEP 6:  Check under your cover everyday, and remove it permanently at the first sign of baby carrots germinating.  

Your carrot container will look something like this after a couple of weeks.  If the carrots aren't distributed very evenly, just make sure to try and sprinkle the carrot seeds more evenly next time.  

STEP 7:  Try to thin your carrots when they are a few inches tall.  I pull mine entirely out, but you can also pinch them off if you find that this disturbs the soil too much.   Try to leave enough space around each carrot to allow it to grow to the thickness of the variety you planted.

A few weeks before harvest your buckets will be filled with tall bushy carrot tops!  

STEP 8:  Pull your carrots!  You can sweep away the dirt at the top of your carrots to check on how big they are getting. Harvest according to the variety you planted.  I pulled these all at once, but you can leave some carrots in the buckets and harvest as needed.  You may not want to do that if you need the container to re-plant, but that's why I have 6 buckets in various stages of growth at all times!


With the addition of compost tea or another fertilizer, you can use the potting soil for multiple years and get several harvests a year!  You may have to pull some weeds the second year, but they are usually not as deep or established as ground weeds.   Growing carrots in pots or containers is also a good way to avoid other common carrot pests like carrot root fly.

Monday, May 28, 2012

#%$*&@!!!!!!!!!!

Wow.

So the year that I finally get it together enough to plant peas in March and I can't even plant the correct type.  Arrrrg.

I planted 3 different types of peas, all from seed I got last fall at local hardware store.  I THOUGHT I was careful enough to pick only types that are snow or snap with an edible pod, but it turns out I am not.  Two of my 3 pea areas are planted with non-edible pod peas, Bolero and Garden Sweet.  What makes it worse is that the third bed that is planted with snow peas was accidentally wrecked by my husband and our new weed-whacker, leaving just four plants capable of producing.

The kids don't seem to care and have been eating the pea pods anyway, but I tried one and it was terrible and fibrous.  I asked them to stop eating them so we can let them grow to shelling size...I'm told fresh peas are amazing, though even the best shelled peas will be bittersweet since they are coming at the cost of snow peas for stir-fry.

The pea circle is planted with Bolero peas...which also explains the bushiness.  Bolero stays pretty short.

A palm full of bolero peas.   We picked them young but they were still very tough.


Ah well.  I guess we'll just have to wait for fall and try again.  In the meantime, we should have shelling peas soon.


Tuesday, May 8, 2012

How to garden on a hillside...


This hillside has been a pain in my butt for 2 seasons now.  There is a flat area at the top and then a sharp slope that is fine for planting things like melons, but gets so quickly overgrown that a raised bed is really the only way to go.  We managed to get some nice salvaged lumber from a friend and built two LARGE raised beds.  We dug the lower one in so that each bed would be level.   Now I have a 10' x 3' bed AND an 8' by 3' bed of beautiful fluffy soil (organic topsoil with rabbit manure, hay, and compost).   

Stage 1:  Cut down grass and loosen sod.


Stage 2:  Level the area where the beds will sit, lay the frames and fill with dirt.


Stage 3:  Bask in the glory of your new garden beds!


They turned out so beautifully that I really think we're going to convert ALL the beds to wooden raised beds as soon as they are empty.  They'll be a heck of a lot easier to weed-whack around, that's for sure.


Monday, April 30, 2012

Harvest Monday: End of April

Once again I actually have a harvest (not bad for April gardening in Pennsylvania with no cold frame) but it's still just one veggie.   Better than nothing!  Head on over to Daphne's Dandelions and check out this week's Harvest Monday post to see what everyone else has been harvesting.

Our radish harvest for the week.

It seems that we are not the only things enjoying the radishes.  I did see several tiny millipedes  in the ground, but I don't know if they caused the radishes to split or just ate the holes into them.

The brassicas are coming along nicely, though I will have to thin them soon.  

The lettuce is also coming along nicely.

The peas growing in the back of the garlic bed finally have a trellis to climb.  I used two U posts and some plastic deer fencing.

Tuesday, April 24, 2012

Harvest Monday: First harvest of Spring 2012!

Ok, so it's just a bunch of spring onions but it's something!  Thanks to Daphne for hosting Harvest Monday (and giving me an excuse to get back on the garden blog horse).


I had decided to pull these and eat them instead of just pulling and replanting...the bed they were in needed about 6 more inches of compost so I could plant herbs.

Spring onions, cleaned and ready to slice.


These are a couple of the thinnings from my radish bed.  They are about dime-sized, and the one on the left is a watermelon radish.  Not much I can do with them though.


I sliced into one of these and they smell strongly of garlic.  Originally I thought it might be onions growing on my hillside, but now I think maybe garlic growing from composted store-garlic.

Wednesday, April 4, 2012

Burgh Bees: The awesome community apiary soon to be in my community!

Without bees, there would be no garden, and if that weren't enough reason for me to love the little critters, they also produce liquid sugar in the form of honey.  How awesome is that?

I bring this up because Burgh Bees is currently waiting for permit approval to build their second community apiary right here in my neighborhood.  I've always wanted to learn more about bee keeping in case I was able to get a hive of my very own in my yard many years down the road...a community apiary would make that goal far more tangible.

A friend of mine has a hive in the first urban community apiary here in Pittsburgh, and when she posted asking if anyone wanted to come see her hive during a volunteer workday I took her up on it.  It was so much cooler than I though it would be!

The sign outside the Burgh Bees community Apiary in the Homewood neighborhood of Pittsburgh.

There are two (that I saw) water tubs inside the apiary so the bees have access to water.  Floating corks act as tiny little bee platforms.

My friend about to open her hive.  I actually got butterflies here...I think I've only seen a bee hive up close on Mr. Rogers.

There were many capped cells, but most on this frame were still uncapped.

A bee on my arm (I got to wear one of the weird-looking bee suits!)

Little bee faces sticking out of the hive.

Down on the ground you can see a pile of bee corpses from the winter drone ejection.

Many people painted or otherwise decorated their hives.  

This person painted a neat city-scape!


I was told that these are ancient symbols of bee-keeping.   How cool.

I wonder if this guy is a saint of bee-keeping?

Tuesday, April 3, 2012

Planning an Accessible Garden

I had been planning on updating this over the weekend, but we ended up dealing with some unexpected issues that have delayed things a bit.  Even now I haven't really been out in the garden today, so I'm throwing myself into planning one of the really exciting gardening projects I've been offered this season!

My husband works with a non-profit that helps disabled individuals live their lives.  The house he works in has a beautiful yard and the gentlemen in the house tend to eat less-healthily than they otherwise could due to the tight food budget.  I offered to stop over once a week with the kids and maintain a small food garden at the house.  All the current workers would have to do was water it and harvest things that are obviously ripe.  The gentlemen in the house would benefit from the interaction with the kids, the time outside, and the fresh food they grew themselves.

The biggest problem with this plan, is the start-up cost associated with a garden.  The house operates on a pretty tight budget, and garden tools and soil for raised beds aren't exactly things that provide a quantifiable benefit as quickly as most other household expenditures.   I can spare some seeds, and barring that each of the men in the house has a food stamp allotment due to their disability that can be used for plants and seeds, but we're still going to have to get creative with everything else.

I have a much larger post about barriers to gardening that I'll be posting soon as a result of this process.  Tomorrow we have a trip to a local farm with the younger kids so that should be fun.  

Monday, March 19, 2012

Spring Garden Cleaning and Planting

Wow, these last few days have been just beautiful and I've managed to get most of the spring garden totally planted.  A few things might be going in a tad early, but I think I can battle any small frosts with mulch and/or row covers.

This is the first time I've ever tried growing lettuce or chard, so it's a total unknown.  I was extra careful to pull out every inch of invasive root growing through my beds in the hopes that I won't have as bad of a weed problem this year.  It's mind-blowing that those roots were even growing into the clay level about 10 inches down...

Anyway, I'll put up the garden plan soon, but in the mean time here are some pictures of progress from the last few days:

Part of the cleaning was pulling up the remains of last year's brassica bed.

Mr. Smiley in front of the garlic bed.

Baby Nugget just sat around eating crackers while the rest of us worked.

Picking rocks out of beds was a popular task.

At one point we had some music in the garden.

The carrots will again be grown in buckets and were actually the first things we managed to plant.

Digging out weeds.

Watering carrots.

The triangle bed will have lettuce and chard this year.

Cabbage and brussel sprouts (a tad close since we will probably lose a few).

Tuesday, January 17, 2012

The best part about growing garlic.

I actually have green stuff in the garden!  In mid January!  In Pittsburgh!  This is the first year we've overwintered garlic (or grown garlic at all for that matter) so it's fun to see signs of life in my otherwise dead front yard.  In late fall I picked up several varieties of organic hard-neck garlic from Enon Valley Garlic and planted one of our 5.5" square beds with it.  I'm sure I could mulch a little deeper, but considering the weather has been unusually warm I think we're OK.  

My Fall-Planted Garlic
If you're in Western PA (or Eastern OH) and want to try a fantastically wide variety of hard and soft-neck garlic, stop by the Enon Valley Garlic booth at one of the farmers markets listed on their home page.  They're a family run organic garlic farm and will even give you pointers on growing your own gourmet garlic at home.  Check out their website for an excellent primer on how to grow garlic.  They also have a photo guide to the different types of garlic they grow.


Monday, January 2, 2012

Year in Review: 2011

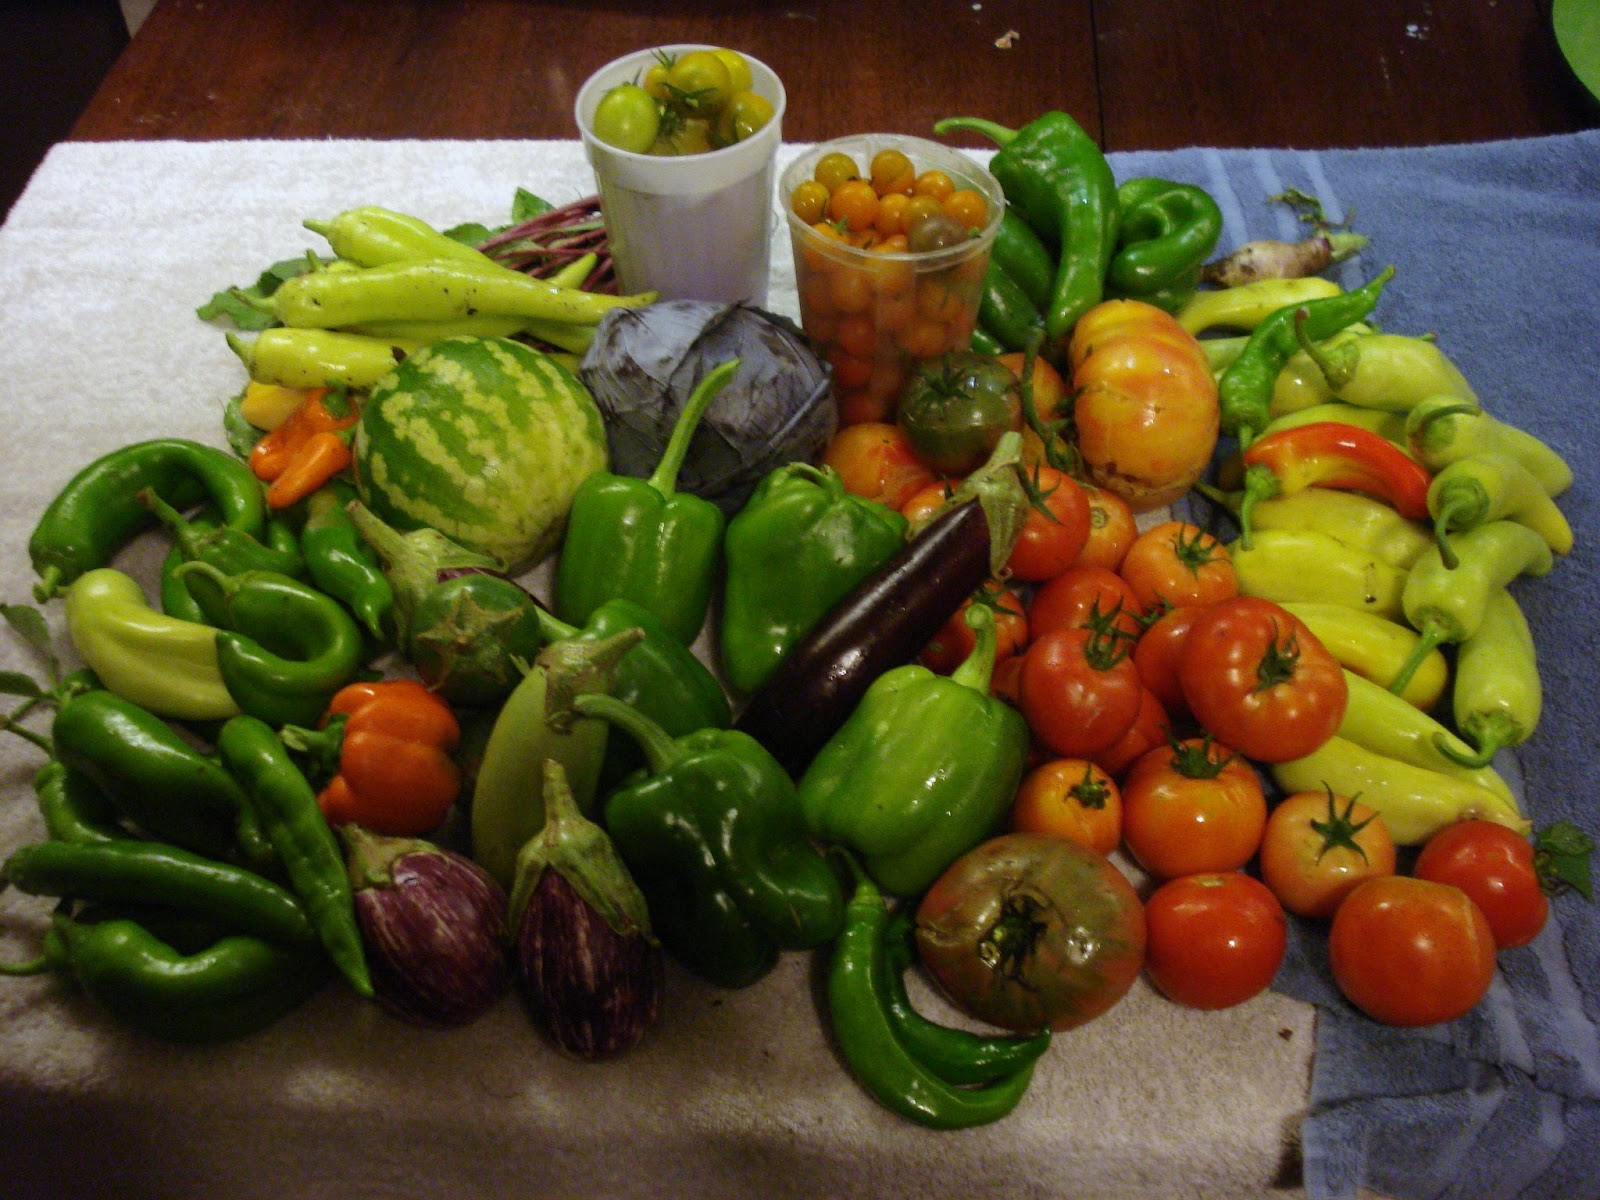
It might not be obvious, but this is actually only the third year we have had any type of garden.  In 2009 we had a single 4 x 4 bed that we filled with way too many plants from a big box store, almost all of which died from the blight that swept through that year.   In 2010 we dug up the first few areas in the front yard and had a decent harvest, but we were able to nearly quadruple our output for 2011 by learning from the previous year's mistakes.

Here are the hits, misses, and things I've learned that will hopefully make 2012's garden even better:

1)  Screw indoor seed starting.  Eggplant, tomatoes, peppers and tomatillos will all be bought as seedlings from the fantastic organic city farm Garden Dreams.  There are just too many factors working against having tiny little plants inside my house that waste my money.  On top of that, I was able to get the kids interested in veggies that they would NEVER eat from the store by choosing all sorts of weird varieties.  When I have room for 6 eggplants, buying 6 different seed packets and the dirt and supplies to grow them indoors is more costly than just buying the plants from people who know what they're doing.

2)  Rabbits are no longer welcome.  In 2010 we had barely any rabbit damage, but now they seem to know where the garden is and visit it daily.  Hopefully some short fencing will suffice since my options are limited.

3)  Fruit!  We have a fenced off sunny area in the back yard that will now be completely dedicated to fruit!  I'm hoping to have ground cherries, strawberries, grapes, raspberries, blackberries and possibly melons growing there.  In the fall we cluster-planted 3 dwarf pear, 2 dwarf plum, and 3 dwarf peach trees after taking down the old half-dead apple trees and may even plant some blueberry bushes along the side of the house in an area that otherwise fills up with weeds.

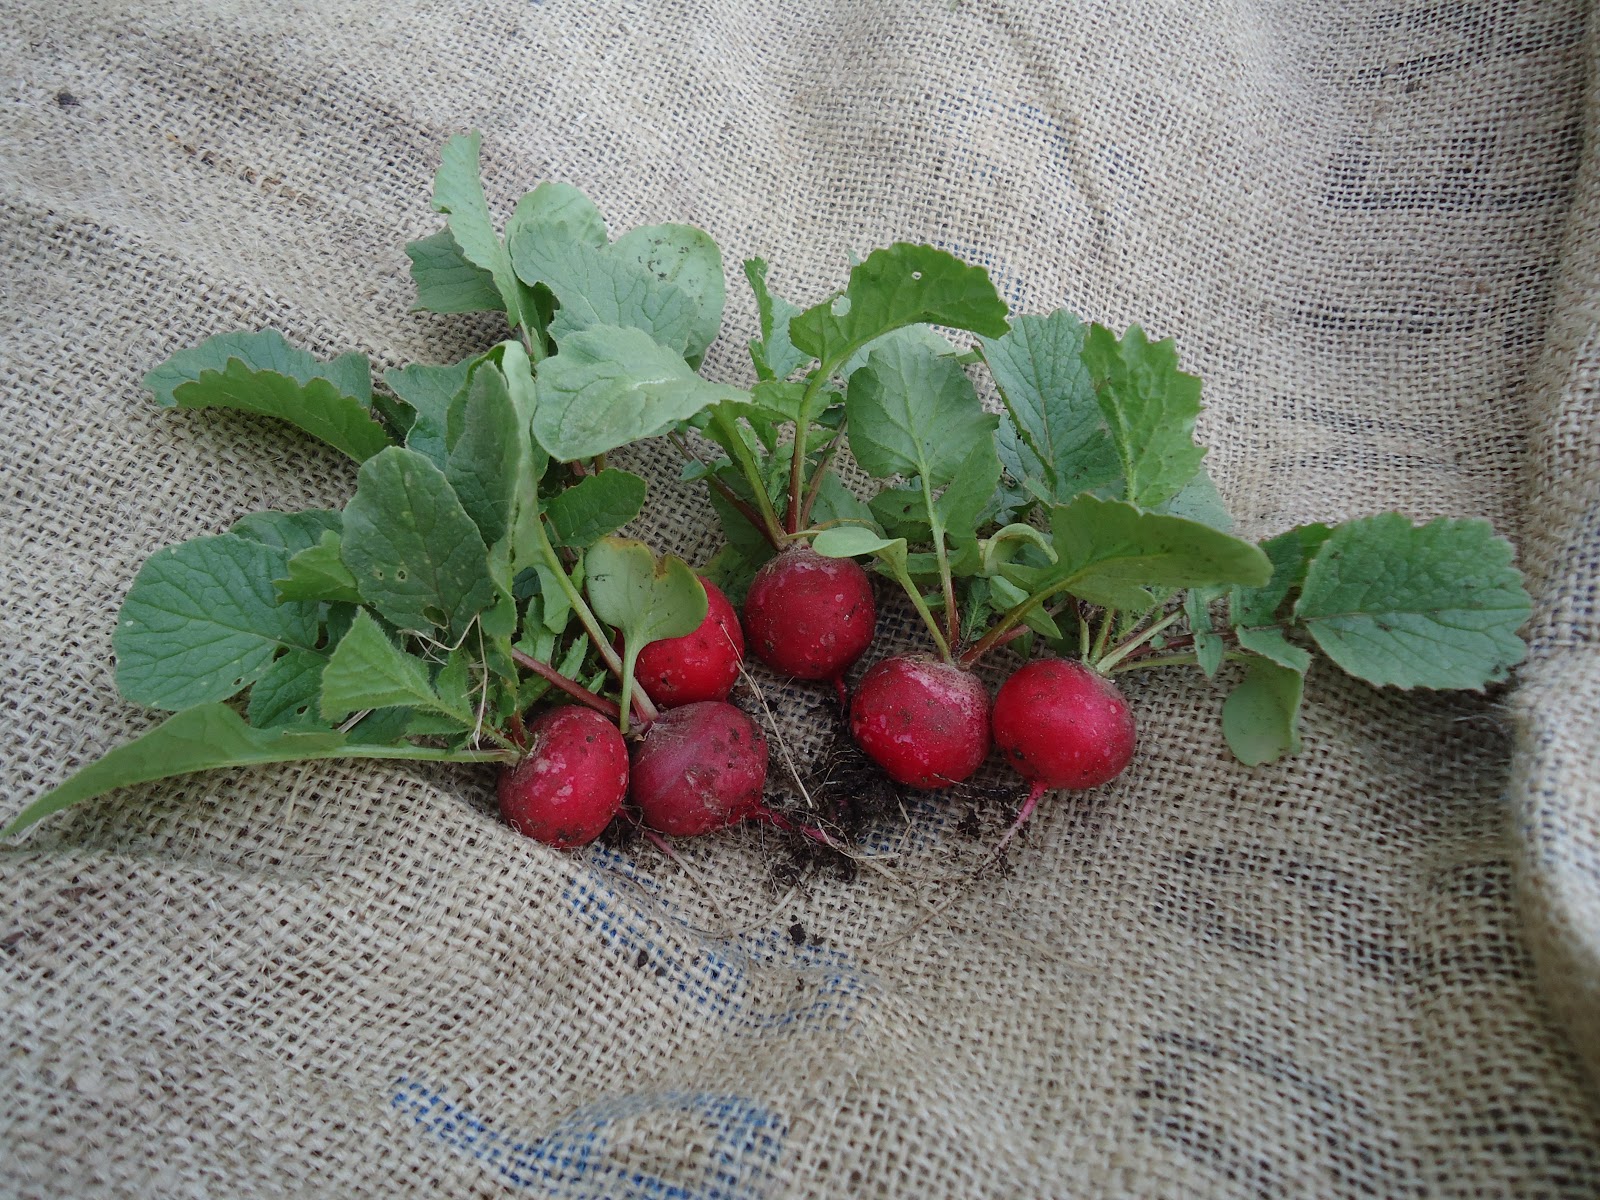
4)  Moar carrots!  Carrots in buckets were a HUGE success!  Radishes, by contrast, were a total failure AGAIN.  I hope to add a few more buckets of carrots (right now I have 4) to the front yard and will only grow short-season carrots to allow for multiple harvests.  We'll try radishes again in the ground but only because they won't waste much time if they fail.

5)  Cull the herd.  There are some vegetables that are just not worth the space to grow.  We go through 10 to 20 pounds of onions a month, for example, and there is just no where to grow that many.  By contrast, we could easily stock the freezer if we took the 5 x 5 bed that was used for onions and grew multiple crops of bush beans and trellised peas.  Onions (even organic) are so inexpensive compared to peas and beans that eliminating onions from the garden just seems like a no brainer.

6)  Better short season brassicas.  Many of our brassicas did pretty well this year, and we will buy the same variety of broccoli and red cabbage that we did last year.  I will be trying new varieties of green cabbage and kohlrabi while adding some cauliflower. We do much better with short season veggies because there is less time for bad things to happen.

7)  Disease resistant squash.  Our summer squash and zucchini was attacked by every single thing that can possibly harm it.  Since I do not have the luxury of planting too far from the diseased ground of last season, I will be looking for varieties that are specifically resistant to as many mildews and pests as possible.  This will come at the expense of being able to plant compact varieties, but since they will now have the larger hillside that was previously occupied by melons, it shouldn't be a problem.

8)  Screw straw mulch.  My garden was a weedy lawn not 2 years ago and the weed varieties tend to be the type that send out horrible strong vines that are impossible to follow through straw.  I'll probably just rent a chipper and make mulch out of the giant pile of sticks we have in the fruit garden area.

9)  No peppers in containers.  They are just too finicky when it comes to wet weather, and things are so screwy that we can't bank on the sky cooperating.  Peppers produced so fantastically in the ground this year that it just made the ones in containers look that much more pathetic.

10)  No volunteers.  I let about 10 tomato volunteers grow this year, and had an amazing harvest of red grape tomatoes and some big meaty types from them.  Unfortunately, several plants produced complete duds due to uncontrolled cross-breeding.  I had three plants that never produced a single fruit without blossom end rot (even when growing right next to a plant producing healthy fruit) and another few that produced bland, boring tomatoes that were probably descendants of something store-bought.  I'd much rather pick up some yummy clearance heirloom varieties late in the season and plant them in any spot large enough for volunteers.

There is also the issue of being better at using and preserving the harvest, and timing my plantings, but those are issues that will probably just get better each year.   I planted some hard neck garlic this past fall and will be starting some early veggies this year, so hopefully it won't be too hard to watch everyone else start seeds indoors. 

Sunday, January 1, 2012

End of the Season Garden Pictures You May Have Missed Since I Didn't Post Them.

Here are the end-of-season harvests and garden pictures taken during my blogger hiatus:


Six types of eggplant!

It's hard to see what happened here, but this is my row of huge bushy tomatoes after it fell over.  The welds on my tomato cages just gave out and collapsed into a mess of metal stakes and hoops.  Clearly I need to use something else next year.

Harvesting in the rain gives everything a nice glossy look.

This was definitely the year of the pepper.

Carrots in buckets were a complete success!

The kids were very excited about the different colors.

They would BEG to go harvest carrots.

I really don't remember what type these are, but they tasted good and were 4-6 inches long.

I will buy another packet of these rainbow carrots to keep the kids interested, but they honestly didn't taste much different than the orange carrots.

This year's pitiful onion harvest.

The broccoli is actually still sending off shoots that we pick now and then.  The weather here in Pittsburgh has been unseasonably warm.

One of the last harvests.  There were a ton of baby peppers on the vines when the first killing frost hit.

My Turkish Orange eggplant took FOREVER to ripen anything.

The harvest when we pulled most of the pepper and tomato plants.

Heirloom tomatoes in various stages of ripening.

A small, late garden harvest.

This is the final "harvest" from mid-November.  Beet greens, a few peas and carrots (even ball shaped ones) that I missed earlier, a handful of mostly-ripe Turkish Orange Eggplants and some peppers that somehow survived multiple killing frosts.   I'm not sure those broccoli plants will ever die.

I know I missed quite a few harvests, but this is a good overview of those last few months.  The weather that was so uncooperative this past spring really seems to have worked out well in terms of garden production this fall.  We could have planted several things that I just didn't think we'd have time for....oh well.